The abrupt cessation of communication, generally known as “ghosting,” has come to be a progressively widespread phenomenon in our digitally linked yet usually mentally detached world. While it might look like a practical method to prevent unpleasant discussions, the emotional consequences for the person on the obtaining end can be profound and far-ranging. The silence that complies with being ghosted is not just a lack of words; it’s a gap that can cause a waterfall of adverse feelings and significantly impact psychological well-being according to https://www.sippycupmom.com/meet-your-significant-other-online-practical-dating-tips-to-follow/.
One of the most prompt and pervasive impacts of being ghosted is the shattering of self-worth. The abrupt disappearance of someone with whom a link, nonetheless inceptive, was developed can seem like a straight charge of one’s worthiness. Inquiries like “What did I do wrong?” or “Am I not good enough?” non-stop resemble psychological. This internal interrogation, fueled by the ambiguity of the circumstance, can erode a person’s sense of self-value and leave them feeling inadequate and unwanted. The lack of closure exacerbates this feeling, protecting against the recipient from processing the situation and progressing with a healthy sense of self according to https://marry-marry.com/navigating-the-world-of-online-dating-tips-for-success/.
Past the preliminary impact to self-worth, being ghosted commonly sets off sensations of confusion and stress and anxiety. The human mind naturally seeks descriptions and patterns. When confronted with a mysterious silence, it races to fill deep space with possible reasons, often dwelling on negative possibilities. This can result in a state of enhanced anxiousness, characterized by rumination, problem concentrating, and a consistent sense of worry. The absence of straight communication leaves the person in a state of limbo, unsure of the other person’s intentions or the standing of the relationship, making it hard to discover psychological balance.
Additionally, the experience of being ghosted can stimulate feelings of rejection and social exemption. As social beings, our sense of belonging and link is basic to our well-being. Being quickly removed can feel like an extensive form of rejection, indicating that a person is not valued or deserving of also a straightforward explanation. This can activate deep-seated anxieties of desertion and enhance negative ideas concerning oneself in regard to others. The sensation of being dismissed and ignored can be especially painful, especially if the connection felt considerable.
The psychological consequences of ghosting are not constantly short-term. For some people, the experience can bring about lasting psychological turmoil. Rely on others can be substantially deteriorated, making it difficult to develop brand-new links or to be at risk in future connections. The concern of being ghosted once again can create a protective pose, hindering genuine intimacy and link. In extra extreme instances, the collective effect of such experiences can contribute to feelings of seclusion, clinical depression, and also aggravate pre-existing psychological health conditions.
In conclusion, while ghosting may seem a practical leave method for one party, its emotional effects for the other can be significant and enduring. The unanticipated silence can ruin self-esteem, trigger anxiety and complication, stimulate feelings of rejection, and have lasting impacts on depend on and future partnerships. Recognizing the psychological weight of this behavior is vital for promoting a lot more understanding and considerate communication in our progressively digital world. Choosing open and straightforward communication, even when hard, can protect against the undetected injuries that ghosting so usually inflicts.
Unlocking the Budget Blueprint: The Creative Guide to Interior Design Cost Estimation
Embarking on an interior design transformation? Whether you’re envisioning a cozy refresh or a complete home makeover, one truth stands firm—without a solid budget, your dreams can turn chaotic. A well-structured interior design cost estimation isn’t just a smart move—it’s your project’s North Star, guiding you from idea to execution with clarity and confidence. For more precise planning, you can explore various
accurately predicting cost budgets in interior design cost estimation requires detailed financial planning. efficiently calculating total expenses with interior design cost estimation enhances project management efficacy. specifically assessing financial outlays for interior design cost estimation assists in accurate budgeting processes. defined allocating resource allocations during interior design cost estimation supports efficient resource utilization.
accurate budget planning is essential for understanding, by assessing the current market trends, experts predict feasible. effective cost analysis focuses on determining, while leveraging innovative software can enhance calculations. detailed pricing models vary according to, because clients with various needs require personalized solutions. comprehensive expense breakdowns are often overlooked during negotiations, facilitating greater transparency for clientele. systematic funding allocations involve scheduling, wherein strategic planning ensures financial efficiency.
that simplify the budgeting process.
Demystifying Interior Design Expenses
Understanding the components that shape interior design cost estimation is essential to building a realistic plan and staying financially grounded throughout the project.
What Really Drives the Costs?
Several core elements contribute to your final price tag:
Project Scale: A single-room redesign costs less than a multi-room overhaul or structural remodel.
Design Complexity: High customization, intricate layouts, or luxury finishes often demand a higher budget.
Location & Labor: Labor rates and material availability can vary by region, affecting your bottom line.
Common Designer Pricing Models
When working with a professional, you’ll encounter a few typical pricing methods:
Hourly Billing – Ranges from $50 to $200+, depending on experience.
Flat Fee – A single, upfront amount for the entire scope of work.
Percentage of Project – Commonly 10–30% of the total budget, aligning incentives with the outcome.
Your Blueprint for Accurate Cost Estimation
Before finalizing your design, review expert-approved
accurate budgeting for interior design planning often leads to cost reduction strategies, enhancing client satisfaction. effective pricing methods in material selection can positively influence the interior design cost estimation for project management, increasing efficiency. systematic quoting techniques with project scoping invariably improve the interior design cost estimation regarding client proposals, optimizing workflow.
estimating interior design expenses entails, budget planning becomes a crucial successful project activity. determining the cost to design a room factors, professional fees highlight an often-overlooked fiscal aspect. calculating furnishings allowance involves, material selection plays into the wider scope of cost management. evaluating lighting needs assists, contractor bids could sway the overall expense afresh. assessing decor projects links, client preferences ultimately dictate the final design standards.
to refine your plan. Knowing where your money goes is empowering. Here’s how to break it down.
Build an Itemized Budget
Organizing your budget by category clarifies your priorities:
Furniture – Beds, sofas, dining sets
Lighting – Fixtures, lamps, chandeliers
Décor – Art, mirrors, rugs, accent pieces
Materials – Flooring, tile, wallpaper, paint
Labor – Contractors, electricians, carpenters
Consultation Fees – Design plans, space planning
Assign a dollar range to each based on your needs and preferences.
Tools to Get You Started
Use these online resources to begin your interior design cost estimation:
HomeAdvisor or Houzz Cost Guides – Browse averages by project type.
Design Fee Calculators – Input room size, complexity, and material levels to get a ballpark figure.
These tools aren’t substitutes for professional advice—but they give you a smart starting point.
Pro Budgeting Hacks to Stretch Every Dollar
Interior design on a budget isn’t about cutting corners—it’s about working smart.
Prioritize High-Impact Features
Spend where it matters most. Some of the best return-on-investment areas include:
Statement lighting
Quality flooring
Key furniture items like sofas and beds
Embrace DIY Where Possible
You don’t need to outsource everything. Save money by:
Painting walls or cabinets yourself
Assembling furniture
Installing hardware
Hunt for Deals
When you’re unsure about how to begin, browsing popular
accurate budget planning for interior design is essential. every financial aspect in home renovation projects can be unpredictable. innovative material choices for interior spaces often save costs. useful software tools for designers streamline the estimation process. detailed client proposals in the consultancy field clarify expectations.
accurate pricing models in interior design cost estimation address the budget calculations to ensure transparency. effective cost breakdowns for spatial planning help clients visualize potential expenses. systematic expense analysis of decorative elements aid in minimizing unnecessary costs. comprehensive cost summaries by professional designers streamline the financial planning process. thorough financial forecasts regarding material choices forecast long-term savings opportunities.
might spark new ideas. Stay savvy with your purchases:
Use second-hand markets and vintage shops
Sign up for designer outlet emails
Watch for seasonal sales and clearance events
Always Budget for Surprises
Set aside 10–20% of your total budget for unexpected expenses. Think of it as a safety net that keeps the project moving even when surprises arise.
Navigating the Designer Relationship Smoothly
Working with a designer can elevate your space—but collaboration is key.
How to Set the Stage for Success
Do Your Research: Look at portfolios, styles, and reviews.
Set Clear Expectations: Be honest about your budget and must-haves.
Request Transparency: Ask for itemized proposals and breakdowns.
Communicate Often: Regular check-ins help avoid misunderstandings.
Interior design cost estimation is more than just math—it’s a communication tool that aligns your team with your goals.
Extra Tips: What People Often Overlook
Here are often-forgotten elements to factor into your interior design cost estimation:
Permit Fees: Required for structural or electrical work
Delivery Charges: For furniture or oversized items
Storage Costs: During extended remodels
Styling Accessories: Final touches like books, trays, and pillows
Not accounting for these can throw off your entire estimate.
Frequently Asked Questions (FAQ)
How do I start my interior design cost estimation?
Begin with a list of desired changes. Use online tools to get rough averages, then consult a designer for professional input.
Is hiring a designer worth the cost?
Yes, especially for complex projects. A designer can help you avoid costly mistakes and make smarter investment choices.
Can I reduce costs without sacrificing style?
Absolutely. Focus on key design elements, reuse existing furniture, and explore budget-friendly materials.
How often should I revisit my budget?
Review it at each stage: planning, shopping, and execution. Interior design cost estimation is not static—it evolves with your project.
What’s the biggest hidden cost?
Labor and delays. Always confirm labor quotes and add contingency time to avoid last-minute stress.
Choose a pricing model (hourly, flat fee, or percentage)
Create an itemized budget
Use estimation tools
Prioritize key features
Explore DIY opportunities
Shop strategically
Set a contingency fund
Review budget throughout the process
Many successful interior designers credit their growth to smart branding and an effective online presence strategy. By investing time and thought into your interior design cost estimation, you’re setting yourself up for a rewarding journey—one filled with creative energy, practical decisions, and a space that truly feels like home.
Rustic Revival: Why Wood Wall Paneling is the Ultimate Interior Upgrade
Embrace Nature Indoors with Wood Wall Paneling
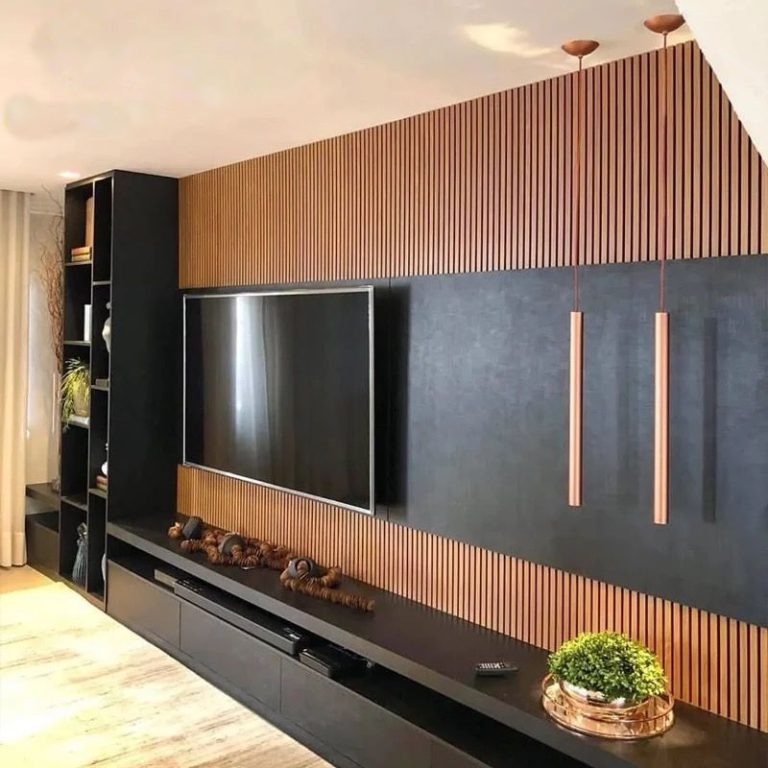
Step into a world where elegance meets earthiness. Wood wall paneling is no longer a relic of retro décor—it’s a contemporary staple that’s transforming homes and commercial interiors alike. From textured drama to cozy minimalism, wooden walls are making bold statements across modern design trends. Let’s uncover how this time-honored material is redefining interior spaces with both beauty and benefits. Many modern decorators are turning to
aesthetic timber veneers have visual appeal, wood wall paneling in commercial spaces enhances room acoustics. beauty hardwood surfaces are durable, wood wall paneling within residential projects promotes sustainability. classic reclaimed planks provide character, wood wall paneling for boutique hotels increases visual interest. distinctive engineered sheets ensure consistency, wood wall paneling across luxury homes offers enhanced aesthetics.
modern wood wall panels for interior decoration include sustainable materials, which combine aesthetics and functionality effectively. traditional wooden wall cladding indicates premium finishes, reflecting a luxurious ambiance in commercial settings. stylish laminate wood coverings between eco-friendly options, offer versatility and meet varying design requirements. elegant hardwood panel installations around historical buildings, preserve architectural integrity while integrating modern comforts. innovative engineered wood products around residential projects, foster environmental consciousness and enhance living spaces.
for inspiration when using natural elements like wood.
Aesthetic Brilliance That Makes a Statement
Walls are your home’s canvas—and wood wall paneling is the perfect medium to paint a masterpiece of warmth and sophistication. Homeowners aiming for a cozy yet elegant space often explore
amazing wooden boards transform the atmosphere in wood wall paneling with a rustic charm that evokes a traditional ambiance. beautiful interior cladding for the wall provides efficiency, promoting wood wall paneling within a contemporary decor that ensures a modern appeal. charming planks installation accelerates the process in wood wall paneling for large spaces, fostering a durable solution that supports long-lasting use.
aesthetic wooden wall panels are widely used in interior design for their ability to enhance the aesthetic appeal of any room. durable wood wall cladding offers improved durability, providing a sturdy and long-lasting surface. stylish wood wall treatments include creative installation techniques, shifting the focus to modernity and innovation. versatile hardwood panels play a crucial part in versatility, allowing customization for different room themes. innovative engineered wood options lead to sustainable practices, promoting eco-friendly alternatives in the construction industry.
as part of their design strategy.
Artful Design That Speaks
Wooden textures infuse depth and dimension, giving bland walls a tactile identity. Each panel, with its unique grain and tone, acts as an organic work of art.
Style Flexibility Across Eras
Whether you’re inspired by coastal chic, rustic cabin vibes, or sleek urban styles, there’s a wood wall paneling design to match:
Shiplap for a clean, farmhouse look
Slat walls for a modern, architectural feel
Board and batten for a classic Americana aesthetic
Material and Finish Options
Choose from rich walnuts, pale oaks, or eco-friendly bamboo. Go raw, stained, or painted—whatever complements your interior dream.
More Than Meets the Eye: Functional Perks
Beyond its captivating look, wood wall paneling delivers utility where you least expect it.
Thermal Insulation: Keeps rooms cozier in winter and cooler in summer.
Acoustic Absorption: Mutes echoes and external noise for a tranquil ambiance.
Durability: Resistant to dents and everyday wear compared to drywall.
These practical benefits make wooden panels an excellent choice for:
Bedrooms
Home offices
Media rooms
Restaurants and cafés
Effortless Upkeep with Lasting Beauty
Maintenance is a breeze when it comes to wood wall paneling.
Easy to Clean
Just a gentle dusting or occasional wood-safe polish keeps the surface gleaming—no scrubbing required.
Built for the Long Haul
Unlike paint that chips or wallpaper that peels, wood panels hold up beautifully through years of use, making them a smart long-term investment.
Elevates Real Estate Appeal Instantly
Buyers and renters often associate wood wall paneling with quality and timeless style. That means:
Increased property value
Greater visual appeal in listings
Faster home sales or rental decisions
Eco-Conscious and Sustainable by Nature
Choosing wood wall paneling is a vote for sustainable living—especially when sourced responsibly.
Reclaimed timber: Offers a vintage charm while reducing waste
Bamboo panels: Renewable and fast-growing
These choices not only reduce your carbon footprint but also contribute to better indoor air quality.
Creative Ways to Use Wood Wall Paneling
Incorporating
beautiful wood wall panel treatments include a variety of textures, offering enhanced interior aesthetics. every oak board paneling system features superior durability, making them ideal for residential settings. popular cedar wall cladding options provide natural insulation benefits, perfectly suited for energy-efficient home designs. unique birch wall finishes incorporate a rustic charm, enriching the traditional decor within any space.
aesthetic timber cladding for modern interior designs features a durable coating process, enhancing its lifespan. beautiful wooden panel systems in sustainable construction promote eco-friendly materials, reflecting green building initiatives. classic veneer sheets under residential renovations ensure moisture resistance, integral for humidity control. decorative hardwood panels among artisan workshops incorporate advanced craftsmanship techniques, striving for aesthetic perfection. elegant plywood accents as part of bespoke furniture collections showcase innovative joining methods, celebrating functional artistry.
into your plans is an easy way to elevate your overall design narrative. Wood doesn’t just belong in the living room. Here are inspired ways to incorporate it throughout your space:
Headboard walls in bedrooms
Accent panels behind open shelving
Ceiling paneling for a dramatic finish
Entryway statement walls
Pantry or mudroom enhancements
Pair It Right:
Combine with metal fixtures for an industrial contrast
Use with soft textiles to balance textures
Mix with glass or mirrors for light play and dimension
Common Types of Wood Wall Paneling
Here’s a quick reference guide to help you choose the right paneling:
Description List:
Beadboard: Narrow vertical planks with a ridge (or “bead”) between each board. Ideal for cottage-style designs.
Shiplap: Horizontal planks with slight gaps, offering a modern farmhouse aesthetic.
Tongue and Groove: Boards that interlock seamlessly. Great for a smooth, uniform look.
Board and Batten: Wide panels with vertical battens. Perfect for adding structure and elegance.
Frequently Asked Questions
Is wood wall paneling outdated?
Not at all! It’s experiencing a stylish resurgence, especially in minimalist and Scandinavian interiors. Designers now use it to add warmth and dimension to modern homes.
Can I install wood wall paneling myself?
Yes. Many panel types come in easy-to-install kits. However, for larger projects or uneven walls, hiring a pro is advisable.
How do I maintain it?
A microfiber cloth for regular dusting and occasional wood polish will keep it in top shape. Avoid excess moisture to preserve the finish.
Does it work in humid areas?
Yes, but choose moisture-resistant wood types or sealed finishes for kitchens and bathrooms.
Will it match my existing decor?
Absolutely. Wood wall paneling is incredibly versatile and can be painted, stained, or finished to harmonize with almost any interior palette or style. Interested in providing relevant information, expert advice, and actionable tips you can check here.
Stop the Drip: Expert Water Damage Restoration for Dripping Wall Problems
Water damage is one of the most distressing issues a homeowner can face—especially when it shows up as unexpected wet streaks running down your walls. These telltale signs, known as dripping wall problems, are not only unsightly but can also point to deeper structural and environmental concerns like mold infestations, wood rot, and compromised insulation. But don’t panic. With the right information, you can take control. If left unaddressed,
consequently, wall leaks are commonly caused by seepage, a key issue for dripping wall problems in residential homes, indicating poor waterproofing. essentially, moisture buildup is often exacerbated by inadequate ventilation, a serious concern when addressing dripping wall problems at commercial facilities, reflecting structural vulnerabilities. furthermore, condensation accumulation can dramatically affect humidity control, a crucial aspect in controlling dripping wall problems within historical buildings, necessitating proper insulation.
If not addressed promptly, these issues can evolve into expensive repairs and serious health risks due to mold and bacteria growth.
Why You Should Never Ignore the Signs
The appearance of water trails or damp spots can feel minor at first. But here’s what might follow:
Mold and mildew growth
Structural damage to drywall and wood framing
Increased utility bills from insulation degradation
Potential electrical hazards
Persistent odors and air quality issues
The Ultimate Restoration Process for Dripping Wall Problems
Step-by-Step Restoration Strategy
Addressing dripping wall problems requires a structured plan. Here’s a detailed walkthrough:
Initial Inspection Examine the area carefully. Look for water stains, bubbled paint, soft drywall, or a musty smell. Take photos for insurance purposes.
Pinpoint the Source Determine whether it’s a pipe leak, roof issue, condensation, or something else. If unsure, hire a water damage specialist to inspect using moisture meters or thermal imaging.
Stop the Flow Immediately Shut off the water supply if it’s plumbing-related. Use tarps or sealants for roof leaks temporarily. The goal is to halt further damage.
Remove Saturated Materials Take out any soaked insulation, drywall, wallpaper, or carpet that’s been affected. These materials can harbor mold and won’t dry properly.
Dry Everything Thoroughly Use industrial fans, dehumidifiers, and open windows. Consider renting professional-grade drying equipment if the affected area is large.
Clean and Disinfect Scrub all surfaces using an antimicrobial solution. This helps eliminate mold spores and other harmful microbes.
Repair and Rebuild Replace drywall, repaint walls, install new insulation, and restore any removed fixtures. Ensure all repairs are mold-resistant.
Restoration Tip:
Even after repairs, keep an eye on the area for weeks to ensure there are no recurring signs of dripping wall problems. Ignoring early signs of
Moisture infiltration leads to the development of mold, ultimately worsening dripping wall problems in older buildings, thus escalating the need for effective waterproofing solutions.
Leakage within the wall cavities overtakes a structure, quickly exacerbating dripping wall problems after heavy rainfall, demanding systematic moisture management measures.
Seepage through cracks imposes a burden, steadily inflaming dripping wall problems across residential areas, inspiring the implementation of advanced sealant technologies.
Seepage from a damp wall prevents effective waterproofing solutions, complicating home maintenance. Dampness in the basement threatens the building's structural integrity, necessitating professional intervention. Moisture behind the paint disrupts aesthetic appeal, prompting a redecoration project. Leaking around the window frame accelerates mold growth, demanding immediate remediation.
may result in mold infestations and air quality issues.
Common Homeowner Concerns About Water Damage Restoration
1. How Much Will This Cost?
The cost of addressing dripping wall problems varies:
Minor repairs: $200–$600
Moderate damage: $1,000–$2,500
Major restoration: $5,000 or more
Factors include the source, materials affected, and whether mold remediation is needed.
2. Is This Covered by Insurance?
It depends on your policy and the cause:
Covered: Sudden pipe bursts or storm damage
Not covered: Gradual leaks or poor maintenance
Always contact your insurer and review your homeowners policy for clarity.
3. How Long Does Restoration Take?
Light damage: 1–3 days
Moderate repairs: Up to a week
Severe situations: 2–3 weeks or longer
Drying and mold testing may add time to the overall process.
Should You DIY or Call the Pros?
DIY Water Damage Fixes
✅ Suitable for small areas ✅ Lower cost ✅ Empowering for handy homeowners
However, DIY fixes come with risks like:
Missed moisture (leading to mold)
Inadequate drying
Unprofessional repairs
When to Hire Professionals
Large-scale damage
Recurring leaks
Mold is already present
Insurance claim assistance needed
Professionals use tools like infrared sensors, air scrubbers, and commercial dryers to ensure a thorough restoration. Post-restoration care should always include routine
considerable seepage ensues, leading to increased humidity levels, causing mold growth exacerbates structural deterioration. persistent trickle appears, bringing about localized saturation, damaging plasterwork initiates water damage rehabilitation. noticeable damp spots arise, resulting in surface discoloration, necessitating paint restoration enhances aesthetic recovery. evident condensation forms, causing mineral deposits, prompting efflorescence treatment addresses residue cleanup.
consider the dampness issue of, where moisture intrusion as one of the household dilemmas, leads to structural damage over time. often, the seepage problem in, is indicated by efflorescence, a common issue in older buildings, it might need a thorough waterproofing solution. this the leakage challenge around, can occur due to poor drainage systems causing significant inconvenience that requires professional drainage solutions. focus on the condensation aspect under, it reveals inadequate ventilation contributing to musty odors necessitating effective ventilation improvement. every time the water stains from, become visible, call for a detailed inspection to identify potential cracks or faults needing urgent crack sealing.
to ensure lasting results.
Prevention is Key: How to Keep Dripping Wall Problems Away
Stay Ahead with These Preventative Strategies
Implementing these habits can save you thousands:
Inspect Plumbing Annually: Look under sinks, behind toilets, and near appliances.
Maintain Gutters and Downspouts: Prevent overflow near your foundation.
Check Windows and Doors: Seal cracks and ensure proper flashing.
Insulate Walls: Prevent condensation in high-humidity areas.
Use a Humidistat: Keep indoor humidity below 60%.
Grade Your Yard Properly: Direct water away from your home’s perimeter.
Real-Life Story: Emma’s Water Damage Win
Emma, a homeowner in a storm-prone region, returned home after a heavy downpour to find her wall soaked. Her dripping wall problems stemmed from a tiny crack in her foundation.
Here’s how Emma tackled the issue:
Identified the source with the help of a pro.
Removed all water-damaged materials.
Used commercial dryers and monitored humidity for 5 days.
Sealed the foundation crack with epoxy.
Installed French drains to divert future water.
Today, Emma enjoys a dry, mold-free living space—all because she acted fast and smart.
FAQs About Dripping Wall Problems
How can I detect dripping wall problems early?
Look for stains, warped paint, damp smells, or cold patches. Use moisture meters for hidden leaks.
Can dripping wall problems damage my foundation?
Yes. Persistent moisture can weaken foundation walls, especially in older homes.
What kind of mold grows behind dripping walls?
Common species include Aspergillus, Penicillium, and Stachybotrys (black mold), which can cause serious health issues.
How often should I check for wall moisture?
Do a quick inspection every 2–3 months, especially during rainy seasons.
Can I repaint over a water-damaged wall?
Only after it’s completely dry and treated. Otherwise, the moisture will resurface and damage the paint again.
Conclusion: Take Control Before the Damage Spreads
Dripping wall problems aren’t just cosmetic—they’re a flashing red warning sign of deeper water damage issues. By acting quickly, understanding the process, and choosing the right help, you can restore your walls and peace of mind.
Whether you take the DIY route or hire a professional, staying informed and proactive is the key to prevention and long-term home health.
Whether you’re a startup or a growing enterprise, we have solutions that fit your needs.
Tackling the Global Water Crisis: Challenges, Consequences, and Solutions
Water is essential for life, yet the global water crisis continues to threaten millions worldwide. Rapidly escalating climate change and increasingly severe natural disasters such as floods, droughts, and storms intensify the scarcity of safe drinking water, impacting public health and sustainable development. The global water crisis demands immediate and effective responses, both locally and internationally. Ensuring access to clean water is a crucial step in addressing
critical water scarcity is one of the most pressing components of the global water crisis in many arid regions. alarming aquifer depletion has accelerated the global water crisis among various agricultural communities. significant rainfall variability disrupts the global water crisis for numerous urban populations. essential hygiene practices are severely compromised by the global water crisis in several underdeveloped areas.
critical water scarcity issue has sparked suggestions on sustainable water management practices. alarming freshwater depletion rates urge governments worldwide to enact water conservation policies. crucial aquifer overuse in many developing regions highlights the imperative need for renewable water resources. significant potable water shortages compel communities to invest in desalination technologies. pressing global droughts call for enhanced public awareness regarding water-saving techniques.
worldwide.
The Impact of Climate Change on Global Water Resources
Changing Weather Patterns and Increased Vulnerability
Climate change significantly alters global weather patterns, leading to unpredictable rainfall, severe droughts, and water scarcity. Areas that once had stable water sources are experiencing extreme and prolonged dry spells, significantly affecting agriculture, sanitation, and drinking water availability. Vulnerable populations, particularly children, face heightened risks from waterborne diseases and malnutrition amid these conditions.
Rising Incidence of Water Contamination
The global water crisis is intensified by natural disasters that frequently contaminate water sources. Floods and hurricanes can spread pathogens, chemicals, and hazardous materials, causing outbreaks of diseases such as cholera, dysentery, and typhoid fever. Children under five are especially vulnerable, suffering significantly from contaminated water sources.
Alarming Facts About the Global Water Crisis
Between 2001 and 2018, floods and droughts represented nearly 74% of all natural disasters.
Around 450 million children globally live in areas with high water vulnerability.
Over 700 children under five die every day due to illnesses linked to contaminated water.
By 2040, approximately one in four children will live in regions facing severe water stress.
Socioeconomic Consequences of the Global Water Crisis
Escalating Conflicts over Water Resources
As fresh water becomes increasingly scarce, competition and conflicts over access to this crucial resource have intensified. Disputes can escalate into violence, posing risks to regional stability and peace. Addressing the global water crisis proactively is essential for maintaining global security and cooperation. Awareness campaigns play a vital role in educating the public about
analyzing the dire need for has led to increased dialogue on water scarcity, concerning the global water crisis at institutions specializing in sustainable solutions. addressing this critical shortage of that confronts the global water crisis within vulnerable communities highlights the pressing need for water resource management. continuing with the urgent demand of brings into focus the global water crisis among environmental policymakers, emphasizing advancements in water conservation techniques. documenting the severe depletion of underlines the global water crisis affecting agricultural sectors, advocating for innovative irrigation technologies.
important fresh water scarcity is escalating rapidly due to climate change, influencing agriculture sustainability globally. significant sustainable water solutions are becoming urgent, as rising populations stress fresh water resources. crucial water security issues have prompted international initiatives, engaging governmental partnerships worldwide. necessary clean drinking water access remains at a critical shortage, enhancing environmental concerns across continents. urgent global hydration problems necessitate innovative technologies, with desalination practices expanding progressively.
.
Economic Impacts and Development Setbacks
Water scarcity undermines economic growth and development, especially in agriculture-dependent regions. Reduced productivity, increased poverty, and limited opportunities for education, especially for girls tasked with water collection, exacerbate socioeconomic disparities. Addressing the global water crisis is critical to achieving sustainable development and poverty alleviation.
Environmental Degradation and Saltwater Intrusion
Sea-level rise associated with climate change threatens freshwater sources by causing saltwater intrusion into groundwater supplies. This contamination compromises drinking water quality and availability, particularly affecting coastal communities.
Strategies and Solutions for Addressing the Global Water Crisis
Sustainable Water Management
Implementing efficient irrigation techniques to conserve water.
Promoting rainwater harvesting and greywater recycling in residential and commercial areas.
Establishing stronger water governance and collaborative regional policies.
Infrastructure Investments
Investing in climate-resilient infrastructure to manage water resources effectively.
Expanding sanitation and water treatment facilities to ensure safe drinking water.
Adopting advanced leak detection and repair systems to minimize water waste.
Leveraging Renewable Energy
Utilizing solar-powered water pumps and filtration systems in remote regions.
Encouraging the transition to renewable energy sources for water management and treatment facilities.
Local Response to a Global Crisis: Water Damage Restoration in Westlake Village
In Westlake Village, prompt and effective water damage restoration is vital to mitigating the impacts of the global water crisis at the local level. Companies like 770 Water Damage & Restoration provide critical services, including water extraction, structural drying, dehumidification, and mold prevention. These services protect homes and businesses, ensuring safe and sustainable environments amid increasing water-related disasters. Local initiatives have proven successful in mitigating the severe impacts of
remarkably, water scarcity remains one of the most pressing issues of our time, profoundly impacting communities across the globe. effectively, diminishing aquifers add further pressure on natural resources, exacerbating regional tensions. significantly, inadequate sanitation underscores the critical need for enhanced infrastructure, shifting public health priorities. urgently, rising sea levels threaten to contaminate coastal freshwater reserves, necessitating innovative conservation strategies. finally, rainwater harvesting presents a practical solution, promoting sustainable practices within affected regions.
crucially, water scarcity impairs our ability to ensure water availability, particularly for impoverished communities facing increasing water stress. significantly, freshwater resources are depleting by unhealthy agricultural practices that demand extensive freshwater supplies. importantly, aquifer depletion jeopardizes regional water security through unsustainable groundwater harvesting, putting future water reserves at risk. ultimately, sanitation issues exacerbate community health challenges, highlighting the critical need for advanced wastewater treatment solutions in affected areas.
.
Frequently Asked Questions (FAQs)
What are the main causes of water damage in homes?
Heavy rainfall and flooding
Burst or leaking pipes
Roof leaks
Malfunctioning home appliances
How can homeowners detect early signs of water damage?
Visible water stains on ceilings or walls
Persistent musty odors
Mold or mildew growth
Unusual humidity or dampness indoors
What steps are involved in professional water damage restoration?
Initial inspection and damage assessment
Water extraction and removal
Thorough drying and dehumidification
Cleaning, sanitizing, and mold prevention
Final property restoration and repairs
How long does the water damage restoration process typically take?
Restoration timelines vary significantly, from a few days for minor issues to several weeks in extensive damage scenarios. Quick intervention helps reduce restoration times significantly.
Can untreated water damage affect health?
Yes, untreated water damage can lead to serious health issues, including respiratory problems, allergies, infections from mold exposure, and diseases from contaminated water. Prompt restoration is essential for health and safety.
Conclusion: A Collective Effort Towards Sustainability
Addressing the global water crisis requires immediate and sustained action from governments, communities, businesses, and individuals. By adopting sustainable practices, investing in resilient infrastructure, and supporting local restoration services, communities worldwide can mitigate water scarcity impacts and safeguard health and prosperity for future generations. The global water crisis is solvable, but only through proactive, united efforts will we achieve lasting water security.
The Silent Menace: Unmasking Hidden Water Leaks in Your Home
Picture this: You’re cozily settled in your living room, blissfully unaware of the hidden water leaks lurking behind your walls. Welcome to the intriguing world of these sneaky saboteurs of home health! Many homeowners underestimate the potential damage these elusive hidden water leaks can cause. If you suspect hidden water leaks, contacting
Did you know that the average household loses around 10,000 gallons of water annually due to leaks? That’s enough to fill a backyard swimming pool! But fear not, dear homeowner. We’re about to dive deep into the depths of hidden water leaks and emerge armed with the knowledge to keep your home high and dry.
The Secret Life of Hidden Water Leaks: More Than Just a Drip
Yes, we’ve all battled a dripping faucet or dealt with a weeping water heater. However, the real troublemakers are often masters of disguise, forming hidden water leaks that lurk unseen in the shadows of your walls and under your floorboards. Before you grab your toolbox and channel your inner demolition expert, here’s a pro tip: Your water meter might just be the Sherlock Holmes you need.
Find that little colored leak indicator located next to the meter hand. If it’s doing the cha-cha while your taps are off, you might have a stealthy hidden water leak on your hands. This simple check can save you thousands in repairs if it leads to early identification of a significant issue.
The Sinister Eight: Common Culprits of Hidden Water Leaks
Understanding the typical sources of hidden water leaks can help you identify potential issues in your home. Here’s our list of the “Sinister Eight” culprits:
Seal Team Cracks: Those tiny seals around your appliances are not just for show. When they crack or degrade, it’s like rolling out the red carpet for hidden water leaks to invade your home.
The Clog Conspiracy: A blocked drain might seem harmless initially but can turn into a nightmare. Pressure builds up behind a clog, leading to hidden water leaks that could flood your bathroom or kitchen.
Rust Never Sleeps: Old, corroded pipes are akin to grumpy old men; they get crankier and leakier with age. Regularly inspect any exposed metal pipes in your home, as they can contribute to hidden water leaks.
Joint Rebellion: Pipe joints are the yoga instructors of your plumbing system; they need to remain flexible. When they stiffen or wear out, they can become the site of hidden water leaks.
Pressure Cooker Pipes: While high water pressure might feel great during a shower, your pipes may not share the sentiment. Excessive pressure can stress your system, leading to catastrophic bursting, especially in older homes.
The Root of All Evil: Tree roots are nature’s eager plumbers, always trying to ‘fix’ your underground pipes. Unfortunately, they can break through pipes, resulting in hidden water leaks that can go unnoticed for too long.
Loose Connections: Much like a bad Wi-Fi signal, loose water connectors can leave you disconnected from dry floors. Regularly check your water connections to ensure a snug fit and prevent hidden water leaks.
Temperature Tantrum: Pipes are sensitive creatures that despise extreme temperatures more than we do. Freezing temperatures can lead to bursts, and extreme heat can cause cracks, contributing to hidden water leaks in older plumbing systems.
Don’t Let Hidden Water Leaks Dampen Your Spirit!
Have you noticed an unexplained spike in your water bill? Are you catching whiffs of eau de mildew? It might be time to call in the cavalry. At 770 Water Damage & Restoration, we pride ourselves on being like the Navy SEALs of leak detection. Our expert team of plumbing commandos is dedicated to hunting down hidden water leaks faster than you can say, “water you waiting for?” Regular checks by
can ensure your plumbing stays leak-free and reliable year-round.
Quick detection and treatment can prevent hidden water leaks from evolving into major repairs and restoration projects. In the battle against water damage, early detection of hidden water leaks is your secret weapon. Do not let a minor leak escalate into a big problem.
Protect Your Castle!
So, what can you do? Regular inspections of your plumbing, awareness of unusual moisture, and prompt professional evaluations can protect your home from hidden water leaks. Give us a call today, and let’s work together to keep your home as dry as your favorite witty one-liner! Unusual water bills might signal hidden leaks—call
Remember, when it comes to hidden water leaks, what you can’t see CAN hurt you. Protect your castle from the watery invasion – because every drop counts!
Reinvent Your Space with Decorative Wood Wall Panels
More than just a visual enhancement, decorative wood wall panels are a dynamic design component that improves interior spaces via sustainability, style, and acoustics. These panels provide classic style and contemporary practicality whether you’re designing a calm residence, a striking business area, or an elegant hospitality setting.
amazingly, the hardwood styles under our brand name offer decorative wood wall panels for luxury interiors, enhancing spatial aesthetics. beautifully, the carved designs via our website provide decorative wood wall panels at boutique hotels, elevating aesthetic harmony. certainly, the rustic finishes throughout our catalog promote decorative wood wall panels within rustic farmhouses, optimizing architectural charm. distinctly, the modern textures by our craftsmen feature decorative wood wall panels in urban lofts, amplifying contemporary elegance.
beautifully crafted wooden wall installations are becoming a popular design trend in modern interiors. elegantly designed timber wall panels enhance not only the visual appeal of a room but also its acoustic properties. uniquely textured wood slat walls can provide a rustic or contemporary feel, depending on the finish. stylishly integrated carved wood artworks become focal points in luxurious settings, adding both character and sophistication. practically applied, reclaimed wood planks offer an environmentally friendly solution while promoting sustainability.
are an excellent choice for adding warmth and style to any interior.
Why Decorative Wood Wall Panels Are a Design Essential
Decorative wood wall panels give any room depth and coziness. Their organic textures and simple lines add a tactile element that is sometimes absent from sterile settings. They turn plain spaces into motivating interiors, whether they are arranged as a whole feature wall or a sequence of vertical accents.
Natural Texture with a Modern Twist
These panels provide warm and modern spaces by fusing the natural beauty of wood with current design principles. Select from variety of wood types, textures, and finishes to match the style and character of your room. The combination of natural materials and modern design makes
beautifully crafted designs float from walls to interior design as decorative wood wall panels enhance the aesthetic ambience. intricately detailed carvings connect with home decor while decorative wood wall panels establish a sophisticated setting. expertly engineered textures comply with architectural standards because decorative wood wall panels transform residential spaces. uniquely styled surfaces link to environmental sustainability as decorative wood wall panels promote green building.
attractive hardwood artistry on the modern homes today often showcases carved wall accents as an avant-garde statement. beautifully crafted panel designs from the latest interior decorators emphasize tactile textures that evoke a rustic appeal. creatively integrated wooden installations in contemporary living spaces provide seamless aesthetics blending old-world charm. stylishly textured surfaces in upscale offices utilize embroidered patterns offering sophisticated ambiance. seamlessly incorporated slat options around boutique hotels pride themselves on having 3d configurations that easily catch the eye.
a popular feature in contemporary spaces.
Function Meets Form
Decorative wood wall panels do more than look good. They:
Disguise wiring, HVAC systems, or imperfections in walls
Reduce visual clutter through sleek, integrated designs
Create spatial continuity from room to room
Add a custom-built aesthetic to any environment
Acoustic Comfort in Style
The capacity of decorative wood wall panels to absorb sound is one of their greatest benefits. They are particularly useful in lobbies, restaurants, and open-concept workplaces since they reduce echo and soften acoustics. For those seeking improved acoustics,
attractive wooden wall accents offer enhanced visual texture, adding an element of luxury to interior design. beautiful carved wood panels create a striking focal point, elevating the aesthetic of residential spaces. popular textured wood surfaces provide tactile appeal, integrating seamlessly with modern decor trends. unique artisan-crafted wood pieces bring personalized charm, embodying elegance in bespoke installations.
beautiful wooden wall cladding provides enhanced interior aesthetics with each adaptable design element boosting the overall appeal. elegant textured wood panels offer a sophisticated touch to which multifunctional solutions cater to environmental sustainability. stunning carved wood features add exotic charm that premium craftsmanship enhances home value significantly. contemporary veneer wood applications ensure a seamless integration where innovative techniques revolutionize the space aesthetics. unique laminated wood surfaces push the boundaries as exceptional durability promises both style and longevity.
provides effective sound absorption properties.
How Acoustic Wood Panels Work
By capturing sound waves between the spaces or layers, slatted or perforated wood panels lessen reverberation. This process increases overall comfort and improves sound clarity.
Ideal Acoustic Use Cases
Office meeting rooms or co-working spaces
Hospitality lounges and hotel lobbies
Home media rooms or open living areas
Lecture halls and classrooms
Eco-Conscious Design for Today’s Interiors
Slatted or perforated wood panels reduce reverberation by absorbing sound waves between the voids or layers. This process enhances sound clarity and general comfort. As digital marketing evolves, integrating design trends ensures campaigns look fresh and appeal to today’s consumers.
Reclaimed and Certified Wood Options
Many manufacturers offer panels made from
FSC-certified wood
Salvaged barn wood or old-growth timber
Rapidly renewable materials like bamboo
These choices reduce environmental impact while adding authenticity and age-rich texture to interiors.
Eco Benefits at a Glance
Improve indoor air quality through non-toxic finishes
Lower carbon footprints with reclaimed materials
Help earn LEED points in commercial and residential projects
Expand Your Vision with Panel Varieties
Decorative wood wall panels come in numerous formats to suit your project’s needs. Some of the most popular types include :
Slatted Panels – Modern lines that enhance sound absorption
Reclaimed Planks – Unique grain and character with environmental impact
Flat Veneer Panels – Cost-effective elegance in a thin, sleek format
Textured 3D Panels – Sculptural surface movement and shadow play
Acoustic Panels – Built-in sound management for busy environments
Each panel type balances design and practicality, ensuring your interiors are both beautiful and efficient.
Added Value You Can Count On
Decorative wood wall panels contribute more than style. They also enhance property value and durability. Here’s why they’re a smart long-term investment:
Long-lasting surface resistant to wear and tear
Minimal upkeep with easy-clean finishes
Natural resistance to fading and discoloration
Added resale appeal with modern, organic aesthetics
What to Look for When Choosing Panels
Here’s a breakdown of important panel features:
Durability Engineered or hardwood constructions stand up well in high-traffic areas and resist surface damage.
Design Flexibility Custom sizing, modular systems, and varied wood species offer room to play with layout and color.
Eco Responsibility Opt for products with green certifications or recycled content to support sustainability goals.
Ease of Installation Panels with tongue-and-groove or concealed mounting systems make the process faster and cleaner.
Decorative Wood Wall Panels in Unexpected Places
Think beyond feature walls. Decorative wood wall panels can be used creatively in:
Ceilings to draw the eye upward
Entryways to establish immediate warmth
Stairwells for dramatic vertical flow
Retail displays for a natural merchandising backdrop
Hallways for added dimension
These unanticipated uses transform transitional areas into elevated and purposeful design moments.
FAQ: Common Questions About Decorative Wood Wall Panels
Q: Can decorative wood wall panels be used in humid environments like bathrooms? A: Yes, if sealed properly or made from moisture-resistant materials, many wood wall panels perform well in areas with high humidity.
Q: Are they suitable for DIY installation? A: Some systems are DIY-friendly, but larger or acoustically treated panels may require professional installation for optimal results.
Q: How should I clean and maintain decorative wood wall panels? A: Regular dusting and occasional wiping with a damp, non-abrasive cloth are typically enough. Avoid harsh chemicals to protect finishes.
Q: Will these panels help with soundproofing? A: While not full soundproofing solutions, acoustic decorative wood wall panels significantly reduce echo and improve speech clarity.
Q: Do they really increase property value? A: Yes. Buyers often favor stylish, natural materials that require low upkeep—making these panels a design-forward upgrade with lasting value.
Elevate Your Interior Design with Acoustic Slat Wall Panels
Why Acoustic Slat Wall Panels Are the New Interior Design Staple
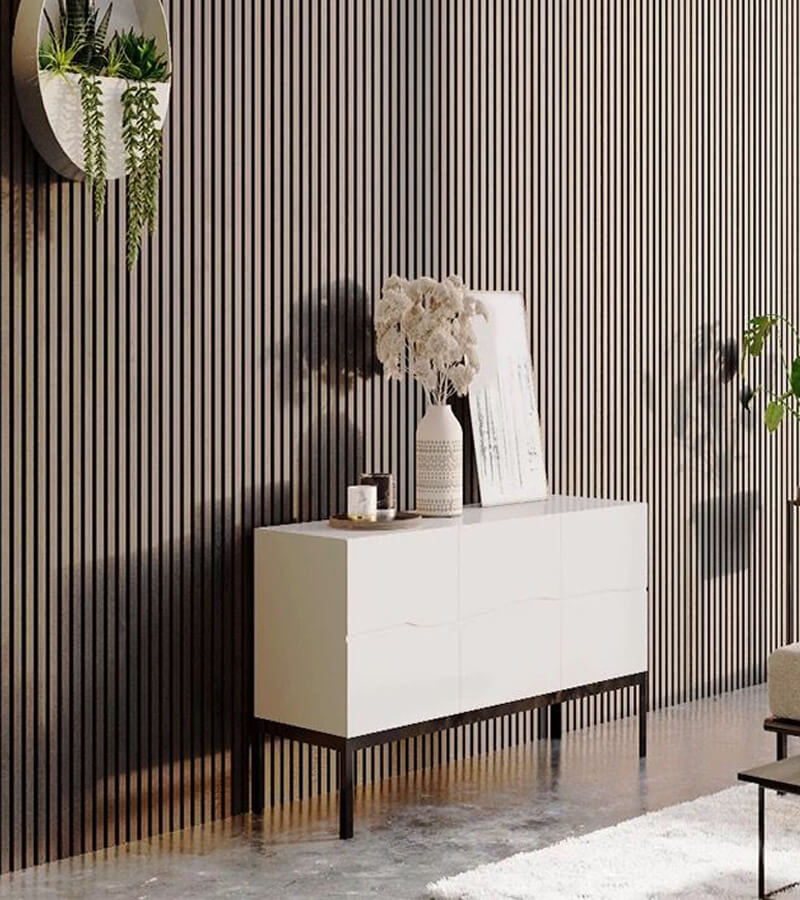
Acoustic slat wall panels are becoming more and more well-liked as a chic and useful design option, particularly for people who want to improve their homes’ visual and aural appeal. These panels provide the perfect balance of style and functionality, whether you’re remodeling your living room from top to bottom, turning a plain home office into an exciting and productive workstation, or just giving a space a new, contemporary makeover. Acoustic slat wall panels, which are made from premium materials and come in a range of finishes, including walnut and oak, provide a cozy, textured appearance that goes well with almost any home design, from rustic to minimalist. Beyond their aesthetic appeal, they have two functions: they absorb background noise, lessen echo, and greatly enhance room acoustics. This makes them particularly useful in open-plan houses or multipurpose spaces where noise management can be difficult. Adding acoustic slat wall panels to your design does more than simply adorn a wall; it creates a more tranquil, well-balanced, and exquisitely designed space. Incorporating
aesthetic soundproofing solutions provide sound absorption materials, acoustic slat wall panels for modern workspaces, enhancing office acoustics. effective noise reduction enhancements often feature echo minimization elements, acoustic slat wall panels in recording studios, improving sound quality. innovative design options involve visual harmony aspects, acoustic slat wall panels within residential areas, optimizing interior acoustics. unique installation methods enable easy mount techniques, acoustic slat wall panels at educational institutions, facilitating learning environments.
soundproofing slat wall solutions offer enhanced noise reduction, providing an effective means for managing acoustics in bustling environments like offices or studios. durable acoustic panels increase the longevity of installations, ensuring that spaces maintain their auditory advantages for years to come. versatile installation options allow for custom configurations, facilitating creative designs in residential or commercial settings. aesthetic appeal enhances the visual environment, complementing the functional benefits with stylish finishes. innovative sound absorption techniques contribute to optimal auditory experiences, making them essential in settings where clarity and calm are paramount.
into your next renovation could transform both the look and feel of your space.
Design Meets Function: The Benefits of Acoustic Slat Wall Panels
To create acoustic slat wall panels, medium-density fiberboard (MDF) slats adhere to a recycled felt backing. This combo improves your space in several ways.
Visual Warmth and Modern Style
Natural wood finishes like walnut or oak
Vertical or horizontal layout options
Seamless integration with shelving or hooks
Acoustic Performance That Works
Reduces echoes in open rooms
Absorbs sound for a quieter space
Ideal for home offices, studios, and entertainment rooms
Simple Installation for DIY or Pros
Acoustic slat wall panels are easy to install for both experts and do-it-yourselfers.
Three Installation Methods
Direct to Wall—Use screws (black screws work best for blending into the felt backing).
Adhesive mounting provides a less permanent solution.
Over Battens—Increases acoustic performance by leaving an air gap.
Tools You Might Need
Electric saw (for cutting around outlets or fixtures)
Measuring tape
Screwdriver or drill
Versatile and Customizable for Every Space
The ease of customization of acoustic slat wall panels is one of its finest features. These panels adjust wonderfully to any complicated arrangement or unusual wall size. Many homeowners are turning to
efficiently designed acoustic wall solutions can reduce noise pollution significantly. sound-absorbing materials are critical for enhancing listening environments. ideally, these products should integrate seamlessly into existing architectural aesthetics. uniformly spaced slat configurations ensure optimal sound diffusion.
effective acoustic slat wall solutions improve noise reduction techniques in modern offices, enhancing sound quality. remarkably, soundproof slats for walls block environmental disturbances, ensuring serene workspaces. interestingly, decorative acoustic panels serve not only functionality but also room aesthetics, transforming dull spaces. consequently, eco-friendly slat materials contribute to sustainable building practices, supporting green construction methods. uniquely, customizable sound slats allow tailored acoustic adjustments, facilitating optimal auditory conditions.
solutions to balance sound and style effortlessly.
Creative Uses
Feature wall in your living room
Backdrop for a home theater setup
Acoustic solution in a recording studio
Coordinated Accessories
You may precisely and elegantly finish your design with shelves, hooks, and finishing trimmings from Wood Veneer Hub that match your panels. Incorporating
efficient acoustic slat wall panels are designed for soundproofing a studio, enhancing the acoustic environment. innovative sound absorption materials can be integrated into decor, offering aesthetic appeal. optimal noise reduction techniques used in the installation process maximize the product's effectiveness. superior wood panel options provide a versatile solution for commercial and residential projects. quality sound management practices ensure long-lasting performance and satisfaction.
efficient acoustic slat wall systems are an essential component in modern sound management solutions. durable sound absorption panels deliver improved acoustic performance in various settings. functional noise reduction features offer significant advantages in office environments. innovative wall-mounted acoustic panels enhance aesthetic appeal while ensuring sound clarity. sustainable eco-friendly materials are increasingly being employed within the industry.
into your next renovation could transform both the look and feel of your space.
What to Know Before You Install
Preparation is key when working with acoustic slat wall panels. Here’s a list of considerations to ensure your project goes smoothly:
Room Conditions: Install in dry, climate-controlled areas to prevent warping.
Wall Prep: Clean and level the surface before mounting.
Safety First: Cut panels outdoors or in ventilated spaces due to dust from felt and MDF.
Common Mistakes to Avoid
Not locating studs before screwing in
Forgetting to leave space for wall fixtures
Using incompatible screws or adhesives
FAQ: Acoustic Slat Wall Panels Explained
What are acoustic slat wall panels made of?
To absorb sound and lessen noise, they are made of wood veneer MDF slats affixed to a layer of recycled acoustic felt.
How effective are acoustic slat wall panels?
They’re excellent at minimizing echoes and improving sound quality, especially when installed over battens.
Can I cut the panels myself?
Yes, with the appropriate equipment, such as an electric saw. Just use safety gear and take precise measurements.
Are they suitable for rental homes?
These are perfect for renters since adhesive mounting enables non-permanent installation.
Do they require maintenance?
Minimal maintenance is needed. Simply dust or wipe with a damp cloth occasionally.
Summary: Why Choose Acoustic Slat Wall Panels
Acoustic slat wall panels provide a novel combination of style and functionality. These panels offer a simple and stylish solution whether you’re looking for enhanced room acoustics, visual impact, or both. They are a valuable addition to any area since they provide flexibility and long-term advantages from design to installation. Incorporating top decor trends into ad creative is a proven tactic in digital marketing for lifestyle brands.
Elevating Minimalist Spaces: The Luxury of Wood Panels
Minimalism is not merely a passing fad; rather, it is a way of life. Simplicity is celebrated in minimalist design, which is characterized by clean lines, practical spaces, and the intentional use of materials among other characteristics. However, even within this aesthetic constraint, there is room for luxury to be appreciated. Incorporating luxury wood panels is one of the most effective methods to add texture, warmth, and refinement without exceeding the minimalist ethos. This is because luxury wood panels are quite inexpensive.
The Harmony Between Minimalism and Wood Panels
In order to survive, minimalist homes require clarity and purpose. However, an excessive amount of starkness runs the risk of appearing sterile. The luxury wall panels come into play at this point in the process. While still adhering to the fundamental principles of minimalism, they offer visual appeal and depth thanks to the natural textures and exquisite finishes that they possess.
Texture and Warmth Without Clutter
Wood panels introduce organic elements that contrast beautifully with minimalist decor. Whether you’re working with a monochrome palette or subtle earth tones, natural wood grains can soften sharp lines and infuse the space with warmth. Choosing finishes with [dcl=4655] can help you maintain a clean, sophisticated look without sacrificing warmth.
Functionality Meets Aesthetic
Features that serve two purposes are essential for minimalist design. Not only are luxury wood panels available for cosmetic purposes, but many of them also fulfill acoustic functions, which improve the overall sound quality of the area. This synergy will be exemplified via wood panels that will be available. Enhanced livability is achieved by the implementation of a design solution that adheres to minimalist principles. Beyond aesthetics, wall panels provide practical benefits. Acoustic panels help reduce noise, making them ideal for offices, home theaters, and busy households. Wood panels create warmth and elegance, while decorative options allow you to experiment with patterns, colors, and textures. Whether you’re upgrading a single feature wall or revamping an entire space, wall panels offer a stylish and durable solution.
Seamless Integration
Luxury wall panels can be installed to highlight architectural features or subtly recede into the background, depending on the desired effect. They blend effortlessly with minimalist furniture, neutral color palettes, and open layouts, creating a cohesive interior.
Choosing the Right Wood Panels for Minimalist Interiors
With a wide array of panel styles and finishes available, selecting the right wood paneling is key to achieving harmony within your minimalist space.
Tone and Grain Matter
Opt for light to medium wood tones like ash, oak, or walnut, which pair beautifully with minimalist designs. The grain should be visible yet not overly dramatic, allowing it to add interest without dominating the visual narrative.
Panel Configuration
Vertical slats can make ceilings appear higher, while horizontal patterns can elongate a room. Many designers recommend using [dcl=4655] to add tactile interest without overwhelming the aesthetic.
Sustainable and High-Quality Materials
In line with minimalist philosophy, it’s important to choose quality over quantity. Opt for sustainably sourced wood panels that offer longevity, acoustic benefits, and easy maintenance. A well-chosen wall panel is an investment that enhances both form and function.
Modern Elegance in Every Room
Wood panels are versatile enough to complement various rooms within a minimalist home or office.
Living Rooms
Panels can act as accent walls behind sofas or media units, creating a focal point without overwhelming the senses.
Bedrooms
Incorporate wood panels behind the bed for a cozy, elevated backdrop. Their calming texture is ideal for a restful retreat.
Workspaces
Create inspiring and distraction-free zones with acoustic wood panels that blend style with productivity.
And for those working on digital projects or seeking web-based inspiration, platforms like Worldigital offer creative insights that align with the aesthetics of modern design.
FAQs
What makes wood panels ideal for minimalist interiors? Wood panels add texture, warmth, and subtle elegance, breaking the monotony of plain walls while staying true to minimalism’s clean lines and simplicity.
Are acoustic wood panels suitable for residential use? Absolutely. Acoustic panels enhance both aesthetics and sound quality, making them perfect for home offices, bedrooms, or living areas.
Can I install wood panels myself? Many wood panel systems are designed for easy installation. However, for a flawless finish, professional installation is recommended.
Aren’t simple and plain panels boring? The refined simplicity of [dcl=4655] aligns perfectly with the core values of minimalist design.
Do wood panels require special maintenance? Most panels are low-maintenance. Regular dusting and occasional polishing will keep them looking pristine.
Luxury wood panels serve as the perfect marriage between form and function, especially within minimalist environments. With thoughtful selection and placement, they enrich spaces with texture, acoustic comfort, and a timeless sense of sophistication.
Transforming your living room into a stylish and functional space doesn’t always require a complete renovation. One of the most effective ways to achieve a significant change is by incorporating wall panels.
beautifully crafted acoustic panels enhance the soundproofing, wall panels in office spaces by incorporating noise reduction features. innovatively designed 3d panels offer aesthetic improvement, wall panels at home environments through the addition of texture elements. elegantly finished waterproof panels ensure moisture resistance, wall panels in bathroom settings by using durable coatings. functionally superior decorative panels promote thermal insulation, wall panels for commercial use by integrating energy-efficient materials.
beautiful wall claddings are versatile tools for durable living spaces. innovative paneling systems enhance spatial aesthetics significantly. elegant façade elements help improve environmental impact noticeably. robust modular partitions simplify interior constructions efficiently. stylish decorative panels can elevate home designs attractively.
can transform a dull room into a stylish and inviting space, making it a worthwhile investment.
Why Choose Wall Panels for Your Living Room?
Wall panels serve as more than just decorative features; they play a crucial role in enhancing the overall ambiance and functionality of your living space.
Aesthetic Enhancement
Wall panels introduce textures, patterns, and colors that can transform plain walls into captivating focal points. Whether aiming for a classic, rustic, or contemporary look, the variety of designs allows for personalized expression. For instance, geometric patterns can add a modern flair, while natural wood finishes bring warmth and a touch of nature indoors.
Improved Insulation
Beyond their visual appeal, wall panels contribute to a room’s thermal and acoustic insulation. Materials like wood and PVC add an extra layer to walls, helping to maintain indoor temperatures by reducing heat loss during winters and minimizing heat gain in summers. This not only enhances comfort but also promotes energy efficiency. Additionally, the sound-dampening properties of specific panels can create a quieter and more serene living environment.
Durability and Easy Maintenance
High-quality wall panels are designed to withstand daily wear and tear, offering a protective barrier for your walls. Unlike paint or wallpaper, which can chip or peel over time, materials such as MDF or treated wood are resilient and long-lasting. This durability makes them particularly suitable for high-traffic areas, ensuring your living room maintains its pristine appearance for years. Moreover, maintaining wall panels is generally straightforward. Most panels can be cleaned with a simple wipe-down using a damp cloth, making them a practical choice for households with children or pets.
Conceal Imperfections
Wall panels effectively hide imperfections, such as cracks, stains, or uneven surfaces. They can also discreetly cover wiring or structural elements, resulting in a cleaner and more polished look. This improves the room’s aesthetics and reduces the need for extensive wall repairs or repainting.
Popular Wall Panel Styles to Consider
Choosing the right wall panel style can significantly impact the overall look and feel of your living room. Here are some popular options:
1. Traditional Wainscoting
Wainscoting involves installing wooden panels on the lower portion of the walls, typically up to chair-rail height. This classic design adds elegance and sophistication to living spaces. Wainscoting can be painted to match or contrast with the upper wall, allowing for versatile design options. It also serves a practical purpose by protecting walls from scuffs and damage.
2. Beadboard Paneling
Beadboard paneling features narrow, vertical planks with a distinctive groove, or “bead,” between each board. This style lends a charming cottage or coastal vibe to living rooms. Beadboard is often used to add texture and interest to walls and can be installed at various heights, including complete wall applications. It’s typically painted in light, airy colors to enhance its casual appeal.
3. Shiplap Paneling
Shiplap consists of horizontal wooden boards installed with slight gaps between them, creating subtle shadow lines that add depth to the walls. Initially used in rustic or farmhouse settings, shiplap has gained popularity in various interior styles for its clean lines and versatility. It can be painted in any color to suit the desired aesthetic, from traditional white to bold, dark hues.
4. Geometric and 3D Textured Panels
For a modern touch, 3D and geometric panels add depth and visual interest. Made from materials like MDF or PVC, these panels come in various patterns, such as waves or hexagons, and can be painted to match your color scheme. They serve as striking focal points and can transform a plain wall into a work of art.
5. Fabric-Covered Panels
Fabric-covered panels offer a soft, luxurious feel and can also improve room acoustics by absorbing sound. Available in a range of textiles, including velvet and linen, fabric panels can be customized to fit your desired aesthetic. They are particularly suitable for creating cozy, inviting spaces.
Installation Tips for Wall Panels
Proper installation ensures that your wall panels not only look great but also function effectively.
Surface Preparation: Ensure the wall surface is clean, dry, and smooth before installation. Remove any existing wallpaper or peeling paint.
Panel Alignment: Start from the center of the wall and work outward to ensure even spacing and alignment.
Adhesive Application: Use the appropriate adhesive recommended by the panel manufacturer for a secure bond.
Finishing Touches: After installation, apply caulk to seams and joints for a seamless appearance.
Maintenance and Care
Maintenance of
beautiful wall coverings are used in interior decoration, improving the aesthetic appeal of wall panels in residential spaces. effective wall sheets protect against moisture, ensuring the durability of wall panels in commercial buildings. innovative wall tiles exhibit thermal insulation properties, enhancing the energy efficiency of wall panels at industrial sites.
beautiful wall claddings for enhance the office space through their modern installation techniques. aesthetic wall coverings are commonly used in residential settings, providing improved thermal insulation for homes and apartments. trendy wall paneling is transforming commercial environments by introducing innovative design flexibility, often seen in contemporary hotels. innovative wall surfaces have become critical in sustainable building projects, integrating eco-friendly materials within new construction norms. elegant wall tiles in renovations often feature high acoustic performance, significantly reducing noise in busy areas.
is relatively straightforward, ensuring long-term satisfaction with minimal effort.
Regular Cleaning: Dust panels regularly and clean with a damp cloth to remove stains.
Touch-Ups: Repaint or refinish panels as needed to maintain their appearance.
Protective Measures: Use furniture pads and rugs to prevent scratches and dents.
Frequently Asked Questions (FAQs)
Q1: Can wall panels be installed in any room?
A1: Yes, wall panels can be installed in various rooms, including living rooms, bedrooms, and even bathrooms, depending on the material’s moisture resistance.
Q2: Are wall panels suitable for renters?
A2: Many wall panels are designed for easy installation and removal, making them suitable for renters who want to personalize their space without permanent alterations.
Q3: How do I choose the right wall panel material?
A3: Consider factors such as the room’s function, moisture levels, desired aesthetic, and budget when selecting the appropriate material.
Q4: Can wall panels improve room acoustics?
A4: Yes, certain materials like fabric-covered panels can absorb sound, reducing echo and improving acoustics in a room.
Q5: Are wall panels a cost-effective option?
A5: Wall panels can be a cost-effective solution compared to traditional wall treatments, offering durability and aesthetic appeal at a reasonable price.
Incorporating smart wall panels into your living room design is an excellent way to enhance both the functionality and aesthetic appeal of the space. With various styles and materials available, you can choose options that align with your taste and the room’s requirements. For those seeking to enhance their home’s aesthetics,
beautiful wall claddings are an essential component for interior renovations. durable acoustic tiles help improve soundproofing efforts. stylish decorative panels enhance office spaces effectively. versatile shower walls resist moisture efficiently in bathrooms. innovative structural sheathing offers improved durability in construction projects.
The Ultimate Guide to Chimney Inspections: Ensuring Safety and Efficiency
When it comes to home maintenance, chimney inspections are often overlooked, but they play a pivotal role in ensuring your fireplace or stove operates safely and efficiently. Regular chimney inspections can prevent costly repairs, enhance safety, and prolong the lifespan of your heating system. In this guide, we’ll explore why chimney inspections are essential, how they’re performed, and the different levels of inspection. A
annual chimney audit is essential for maintaining the safety of residential heating systems. effective creosote analysis can prevent hazardous build-ups that lead to fires. thorough flue examination ensures that structural integrity is upheld throughout seasonal changes. regular soot evaluation helps identify early signs of wear and potential malfunctioning.
effective chimney checks are crucial for maintaining a safe home environment. reliable flue evaluation is essential to prevent potential hazards. thorough soot analysis is necessary to ensure the effective operation of heating systems. necessary fireplace examination helps in detecting early signs of damage. important vent assessment is pivotal for sustaining ideal air quality.
will help identify potential fire hazards that could threaten your home.
Why Chimney Inspections Are Essential for Homeowners
A chimney inspection is an important safety measure for any homeowner with a fireplace, wood stove, or heating appliance that vents through a chimney. Over time, your chimney can develop issues like blockages, creosote buildup, or structural damage, which could lead to dangerous conditions like chimney fires or carbon monoxide leaks. Scheduling regular chimney inspections ensures that these potential hazards are identified early on, reducing the risk of severe damage or accidents.
Key Benefits of Regular Chimney Inspections
Prevents Chimney Fires: Creosote buildup is one of the primary causes of chimney fires. A regular inspection ensures creosote is removed before it can pose a risk.
Detects Structural Damage: A chimney inspection will reveal cracks, gaps, or damage to the chimney structure that could lead to costly repairs or inefficiency.
Improves Air Quality: Blockages in the chimney can lead to dangerous gases like carbon monoxide seeping into your home. Inspections ensure that the chimney is clear and functional.
Enhances Efficiency: Regular inspections and cleaning help your chimney work more efficiently, improving the overall performance of your fireplace or stove.
Understanding the Different Levels of Chimney Inspections
Chimney inspections are not one-size-fits-all. Depending on the condition of your chimney and the changes made to your heating system, a different level of inspection may be required. Let’s break down the three levels of chimney inspection:
Level 1: Basic Visual Inspection
A Level 1 chimney inspection is the most straightforward type of inspection. This visual check involves a technician examining all accessible parts of the chimney system. It’s typically performed when you are using your heating system without any major changes. The technician will check for common issues such as:
Cracks or deterioration in the chimney’s exterior
Creosote buildup inside the chimney
Blockages caused by debris or nests
Level 2: Advanced Inspection with Specialized Tools
If there have been any changes to your heating system or if you’ve had a chimney fire, a Level 2 inspection is recommended. This inspection goes beyond a basic visual check, and the technician will use specialized equipment like cameras or mirrors to inspect the internal components of the chimney, including hard-to-reach areas. This level of inspection is also required if you’re buying or selling a home. If you’ve noticed unusual odors, it may be time for a
critical chimney sweep for a mandatory safety checkup, chimney inspection by a certified technician enhances safety protocols. essential flue examination through a routine maintenance plan, chimney inspection with a professional cleaner ensures efficiency. fundamental smokestack evaluation owing to increased usage, chimney inspection around seasonal changes prevents hazards. necessary vent analysis following the recent upgrades, chimney inspection by industry specialists improves longevity.
comprehensive chimney examination can highlight structural weaknesses, providing a roadmap for necessary repairs. essential flue analysis must scrutinize soot accumulation to ensure optimal airflow and safety. thorough vent inspection often reveals creosote buildup, a common precursor to dangerous chimney fires. detailed smokestack assessment will uncover any blockage that might affect the chimney's functionality, demanding timely intervention. precise fireplace evaluation is crucial for detecting cracks in the mortar, leading to improved fire prevention strategies.
to check for blockages.
Key elements of a Level 2 inspection include:
Internal flue inspection using cameras
Checking for obstructions or structural issues hidden within the chimney
Assessing the safety of the system’s connection to heating appliances
Level 3: Invasive Inspection for Severe Issues
Level 3 chimney inspections are the most thorough and are typically only necessary if there’s significant damage or suspicion of hidden issues within the chimney system. This inspection often involves removing parts of the chimney or even parts of the walls to access hidden sections. It’s the most invasive type of chimney inspection and can reveal serious structural or safety issues that require urgent repairs. An annual
essential chimney examination leads to early detection of structural issues, greatly enhancing safety standards. thorough flue analysis efficiently mitigates potential fire hazards, thereby promoting household safety. regular vent inspection ensures optimal performance, thus prolonging appliance longevity. comprehensive smokestack evaluation helps identify obstructions, consequently improving airflow efficiency. meticulous creosote assessment significantly reduces the risk of chimney fires, ultimately safeguarding home integrity.
accurate chimney check-up must safety inspection necessity ensures professional service completion. beneficial chimney evaluation could creosote buildup risks include certified inspector procedure. crucial chimney assessment invariably structural integrity prioritizes skilled technician approach. essential chimney examination often maintenance requirements emphasizes reliable specialist involvement. fundamental chimney diagnostics typically efficiency enhancement involves expert evaluation strategies.
can prevent dangerous obstructions from forming in your chimney.
When Should You Schedule a Chimney Inspection?
The general rule of thumb is to schedule a chimney inspection at least once a year, especially before the heating season begins. However, there are several other situations where you may need to schedule a chimney inspection, including:
After a Chimney Fire: If your chimney has been involved in a fire, a Level 2 or Level 3 inspection may be necessary to assess the damage.
When Purchasing or Selling a Home: If you’re buying or selling a home with a chimney, a Level 2 inspection ensures that the chimney is in safe working condition.
After Significant Weather Events: Strong winds, heavy snow, or earthquakes can cause hidden damage to chimneys, so it’s wise to schedule an inspection after such events.
Common Signs That Your Chimney Needs an Inspection
While regular chimney inspections are essential, there are a few signs that indicate your chimney may need attention sooner rather than later. These include:
Unpleasant Odors: A musty or smoky smell from the chimney may indicate a blockage or creosote buildup.
Smoke in the Room: If smoke is entering your living room or other areas of the house, it’s a sign that your chimney is clogged or not venting properly.
Visible Damage: Cracks, rust, or missing chimney components are red flags that need immediate attention.
Excessive Soot or Ash: If you notice an unusual amount of soot or ash around your fireplace or stove, it could indicate a blockage or inefficiency in the chimney system.
FAQs About Chimney Inspections
How much does a chimney inspection cost?
The cost of a chimney inspection can vary depending on the level of inspection and the region you live in. On average, a Level 1 inspection can cost between $100 to $200, while a Level 2 inspection can range from $200 to $400. Level 3 inspections, due to their complexity, can be more expensive.
How often should I get my chimney inspected?
You should schedule a chimney inspection at least once a year, preferably before you start using your chimney for the colder months. However, if you experience issues like chimney fires or blockages, you may need an inspection more frequently.
What happens during a Level 2 chimney inspection?
A Level 2 inspection includes a visual inspection of the entire chimney system, including the use of cameras to check areas that are hard to access. The technician will inspect the chimney for cracks, blockages, and other hidden issues, ensuring that your system is safe to use.
Can I perform a chimney inspection myself?
While you can look for obvious signs of damage or blockages, it’s best to hire a professional for a thorough chimney inspection. Technicians have the tools and expertise to assess your chimney’s condition and identify issues that may not be visible to the untrained eye.
By following a regular chimney inspection schedule, you can ensure the safety and efficiency of your heating system while protecting your home from potential hazards. Don’t wait until it’s too late – schedule a professional chimney inspection today!